————————————————————————
Stacked Planters Update…see below!
————————————————————————
There’s something zen-like when creating something unique and beautiful for your home. For inspiration, I daily visit my online idea boards (and am now admitting to being a Pinterestaholic), spending many an hour pinning and repinning dream rooms, must-haves, and oh-I-wish-I-thought-of-that kind of projects.
Well, one photo in particular caught my eye, a three-tiered terracotta planter pinned from Amy’s handcrafting blog, positivelySplendid.com. The combination of crafting, gardening, graphic designing, and its function as a home’s house numbers, had this previous “armchair DIYer” fired up and scribbling notes for what eventually became today’s do-it-myself adventure.
After deciding to rehab the entire exterior of our rental home, I knew I wanted to integrate these darling tiered pots into the plan. I was a little apprehensive when approaching my husband with regards to this project, thinking it was a little “girlie”, but, surprisingly, he was totally for it!
The only caveat was that it had to function other than our house numbers; his fear was that he, being the occasional “bull in a China shop”, might one day accidentally knock them over, thus leaving the pizza delivery guy at a loss as to how to find us. Ultimately, my goal for these handcrafted pots was to express a bit of our personality to visitors and neighborhood passersby, all the while providing us with a daily, peaceful greeting and affirmation that we are, in fact, truly home, sweet home.
Supplies:
• 3 terra cotta pots – 1 of each large, medium, and small (the dimensions on the ones I used here are: 10 1/2″, 13″, and 15 1/2″ in diameter).
• 2-3 plastic pots – when turned upside-down, they should fit snugly into the bottoms of the large and medium pots
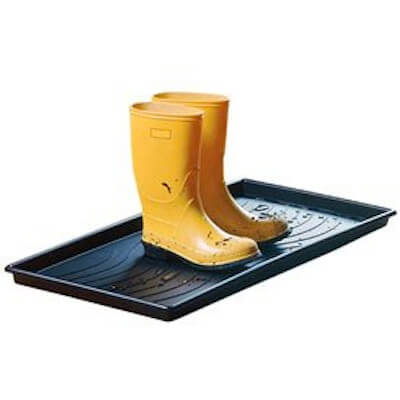
• Tray, for water drainage
• outdoor paint – choose any color(s) you wish-here, I used black and white with a glossy finish. Note: glossy gives it a more finished, modern look.
• 1 large paint brush for the broad stroke painting
• 1 small paint brush for the lettering
• 1 roll Scotch 2090-1A ScotchBlue Painter’s Tape, 1-Inch by 60-Yards
• a power drill
• small scissors
Instructions:
1. Wipe the pots clean of dust and dirt, then with painter’s tape, mask off the inside rim of the pots. Note: because we are inserting soil and plants directly into these pots, it’s better not to paint the inside.
2. Place pots onto paint cans or onto the plastic pots to paint. I covered these with three coats-by the time I finished the last one, the first had dried enough to begin the next layer. Note: save paint and skip the bottoms!
3. While pots are drying, decide and print out what you’d like your pots to “say”-ours read “Home Sweet Home”. I used Sweet Sans for “Home” (the lower pot having a larger fonts size than the top pot’s font) and “Streetscript” for “Sweet”. Both these fonts are available at myfonts.com.
4. Using an exacto knife, start cutting out the lettering for your stencil. Once you’ve created a large enough opening, use a small pair of scissors to finish cutting out the letters. Note: I found the lines to be cleaner using scissors…but, use whatever is easier for you.
5. Adhere the stencil to your pots with painters tape, then carefully hand-paint the letters using the stencil as a guide. Use a black sharpie to crisp up the edges. Note: this part of the project takes a steady hand, but is totally doable. Just be patient, and maybe skip the morning coffee.
Bonus Note: I had previously applied adhesive spray glue onto the back of the stencil to then stipple on the paint, but it had disastrous results: the paint not only dripped and smeared under the stencil, the paper stuck to the pot. When I tried to peal off the paper, it took the paint with it pealing so much I had to sand and repaint the pot all over again…don’t do it!
6. Drill several holes in the bottom and along the inside rim of all the plastic pots. This will offer proper drainage and allow plants to thrive; water will trickle down through the tiers and prevent root rot.
7. If you don’t have any screen remnants (from windows) handy, create your own from any plastic tub top (this was from a small tub of hummus). Drill several small holes to create a drainage screen for the bottom of the large pot.
8. Starting with the largest pot, place screen at the bottom, over the drainage hole. This is so the planting soil won’t fall through, yet allow for needed drainage. (Ah?! DIY thinking at its best! Yes!). Cover with a shallow layer of soil. Note: before placing large pot onto drainage tray, insert a spacer (like two pieces of 1/2″ thick wood) so pot doesn’t sit directly onto tray, blocking drainage hole (see insert).
9. Flip the largest plastic pot upside-down, then place onto the shallow layer of soil. This is the platform for your second tier. Once the plastic pot is in place, fill with dirt, and start embedding plants and flowers as desired. Note: if you have any trailing plants, be sure to place them to the sides so they don’t eventually cover up the delightful lettering you so painstakingly hand-painted!
10. Do the same with the second tier, then on to the third (where no platform is needed).
Voila!
So…how’d I do?
Update!
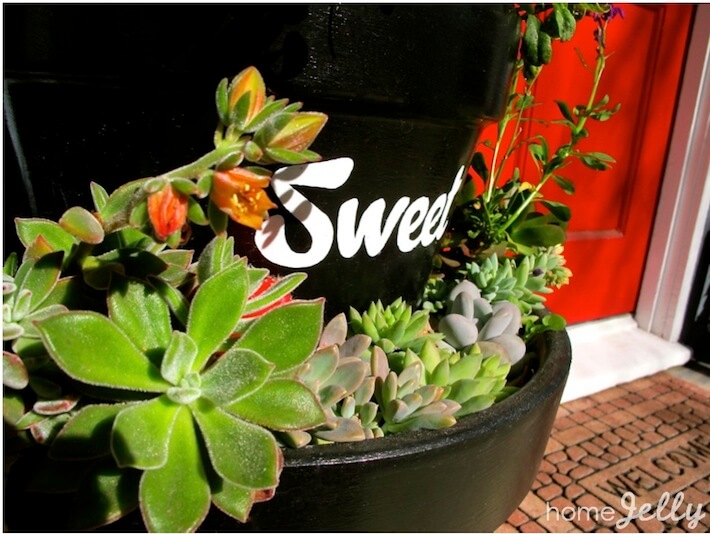
As many of you “green thumbs” know, indoor and outdoor planters often need tending to, even changing and replacing plants and flowers altogether. Being a busy-bee blogger makes this chore a little challenging, so I recently decided to change out my “Home Sweet Home” stacked planters with succulents…my first time trying these interesting little plants. I’ve got to be honest, I haven’t been the biggest fan of this variety, seeing them more as glorified cactus with all kinds of silly shapes and colors.
I must admit now…I’m converted! I absolutely uh-luuuv! these weird, water-filled,low-maintenance plants, opting for the more round, smooth, and/or colorful species, (see list below) and I am over the moon at how easy they are to take care of. Luckily for us in California, the winter months are mild enough to keep succulents outside, but if you live in other parts of the country, invite them into your kitchen, dining or living areas and watch them thrive. See now, some updated pictures of these lovelies…and feel free to let me know what you think!
Here is a list of the succulents I used, links to photo samples of each, and, if they ‘re not available in your neck of the woods, a link to our amazon affiliate store if you’d like to purchase them for your own (or soon-to-be!) stacked planters. Sweet.
• Chalk Fingers ‘Mini Blue’ – Senecio spp. ‘Mini Blue’
• Elephant Bush – “Spekboom” Portulacaria afra
• Super Burro’s Tail ‘Harry Butterfield’ – Sedeveria Hybrid
• Gymnocalycium mihanovichii ‘Hibotan’
• Rainbow Elephant Bush – Portulacaria afra ‘Variegata’
Plant care note: Most of these are drought resistant once established. Protect from frost, water regularly and check to see that well – drained soil is moist.
Purchase your own succulents: order a variety of these weird and wonderful succulents via amazon.com, to give you color and green thumb entertainment all winter long!
If you have photos of your first DIY project, please email them to us here: [email protected].
Photography by Skaie Knox, HomeJelly.com


