I’ve come to realize over these past several years of blogging, that I’m very much like my mom. As a farm girl, she was raised to think practically: from raising chickens for Sunday dinner, to hammering out perfectly good, but bent, nails to be reused again.
This sensible outlook on life presents itself in today’s post. As I was sprucing up our steps for spring this year, I also wanted to replace my aged “Home Sweet Home” stacked planters with something a little more simple, yet functional.
Enter: my newly potted orange plant! To be exact, this is a dwarf Valencia orange tree that grows not only juicy, sweet fruit, it also blooms with the most fragrant orange blossoms…yum! And, besides its entryway-decor charm, the benefit of planting a tree in a pot is that you can move it into a more sheltered area during the colder months of the year (note: these citrus trees should be able to handle the outdoors as long as the temperature is 40 degrees or above).
How to Plant a Citrus Tree Into a Pot
There’s really nothing to it…but, I’ve got a couple handy tips to make it even easier!
Supplies:
• citrus tree
• large, treated terracotta pot* w/drainage saucer
• 8-10 empty small, plastic water bottles
• potting mix (specific for citrus trees)
• regular, quality soil
• optional: river rocks and plastic toy animals
* To insure your DIY painted planter doesn’t eventually peal, seal your terracotta pot with Thompson’s Watersealer, or check out how I personalized this pot to hiply greet guests!
Instructions:
1. Fill the bottom of your pot with plastic water bottles. They should completely cover the bottom and about a quarter of the pot.
Quick-Tip! As opposed to gravel, plastic bottles will help reduce the overall weight, making it easier to move, and provide excellent drainage. Yeah, it does.
2. Add quality soil. This can be from your garden or compost pile. We’re SO lucky that Manhattan Beach will now be offering a food recycling program which will go to a compost pile in the area.
3. Mix in potting soil, specific for citrus trees. This type of soil allows for really good drainage, which is key to growing a healthy fruit tree.
4. Plant your tree. Be sure the top of the soil base is below the edge of the pot.
5. Fill in the sides with more potting soil.
6. Generously water your tree. You’ll then want to water it 1 – 2 times a week.
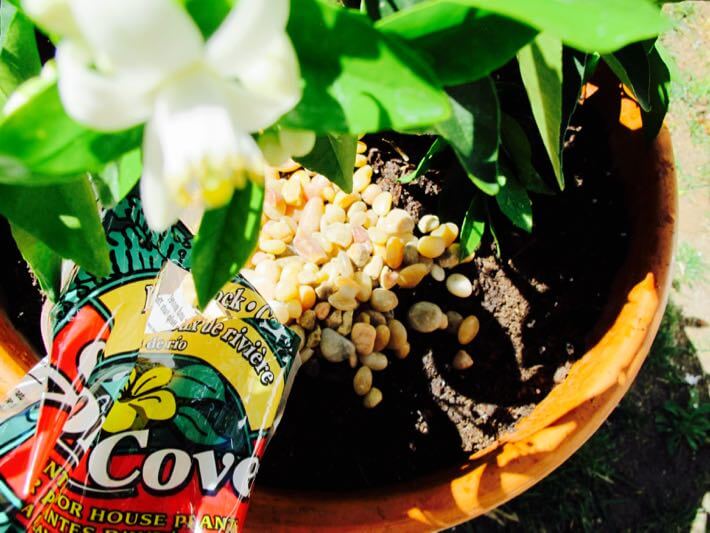
7. Optional: to add a decorative touch, top off with river rocks. They also help keep the soil moist…and they look really cool.
8. Optional: for more quirkiness, add plastic animal figures, mini signs, or whatever your heart desires. I’m planning on changing out the figures depending on the seasons. Why not? It’s fun!
Eventually, as our tree grows, I plan to prune it into the shape of a classic orange tree. Little oranges are beginning to emerge, so, I hope to be squeezing one or two for a mimosa come holiday time! Now, that’s what I call being practical!
All photos by Skaie Knox, HomeJelly


