We are sooo close to finishing the DIY transformation on our rental beach bungalow; one major change has been the easiest, cheapest, and most effective: paint color! We’ve pretty much changed every room in our house from my writing room/office, to our curb appeal makeover. A couple months ago we took to our living/dining room spaces and splashed on a couple new shades by Behr called “Blue slate” and “French Silver” (see now, the finale reveal!).
Oh, how I wished we had the PaintStick.
Our friends at HomeRight recently let me in on what seems to be the best kept secret in DIY home painting. It’s a gadget appropriately called the PaintStick, mainly because…that’s exactly what it is – a stick full of paint!
We were lucky to use it on this past weekend’s laundry room redo which, when we got roll’n, took literally minutes to complete. My husband, Matt told me I could quote him on this: “The PaintStick takes the worst part of painting out of the equation. No dipping or dripping!”
Oh, and ladies? If you want to start ticking off the boxes on your “Honey-Do List”, look into one of these babies…your honey will be begg’n to paint the whole house!
Laundry Room Redo…the prep:
This room was a glorified closet when it came to style. Aside from a couple prints (this one, a 7 year old IKEA print), there was no personality and certainly no color. I didn’t want this room to be an extension of the kitchen, but a space all its own. Still, I wanted it to connect, color-wise, to the rest of the house.
Next month, we are installing this fabulous (and inexpensive) slate stone laminate flooring (it is a rental, you know!). So, we chose to paint it the dark “Slate Blue” to pick up the blues in the “tile”, which will also tie in the colors of the living/dining room spaces. Oh, and, with such a dark color, it also sort of makes this utility room disappear from the kitchen. (Not just a hat rack, my friends!) Check out the laundry room mini makeover “After” reveal!
Ugh…my most dreaded favorite part of painting! It took me, umm…I think it was at least 2 hours to tape and cut in due to the unmovable shelving. It looks like it’s been up there since the 70s, and someone somehow nailed this 7’10” plank of wood into the side of the walls and mounting it onto three, oh-so-attractive white metal brackets. They had to go, but the shelf wouldn’t budge. So, this added another 30 minutes of unscrewing, taping and more cutting in and around. Yay. But alas…the fun finally began…
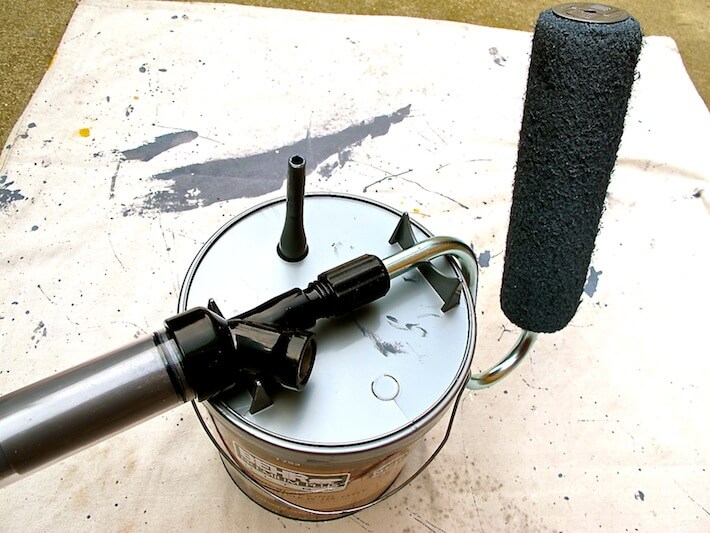
I was at first a little concerned and skeptical. Gadgets can go either way, ya know. I was hoping the supplies list wasn’t going to run into the double-digits. On the contrary, upon opening the box, there was just five items: the paint stick with roller, the fill tube, paint cover, paint guard (which we never ended up using or needing), and the instructions. Nice!
PaintStick…here’s how it works:
1. Once you’ve prepped your wall(s) and grabbed your can of paint, place the fill tube into the cap, then place it into the paint can.
2. Place the PaintStick lid onto the paint can…it should pop into place nicely.
3. Place the fill port onto the fill tube at a 45° angle. You’ll feel it when it’s on all the way.
5. Pull the inner handle to draw the paint into the PaintStick.
6. Now start rolling while slightly pushing the inner handle in to ooze the paint it into the roller.
It took about one tube-full to totally saturate the roller. Then it was game on! Within minutes, we covered all the walls…Matt was in DIY heaven and beginning to eye the next room. We were able to cover a 5′ x 8′ wall in about 1 minute…that’s 60 seconds to those of you with a timer! We refilled probably three times total with no danger of stepping on paint trays. There were absolutely no drips and the consistency was quite good. I did have to roll on a second coat, but that was easy-peasy, too. Just look at how happy my hubby was…
…it didn’t hurt to have Van Halen on in the background, either.
Since it was date night, we didn’t have time to clean the PaintStick so we left it perched on the handy-dandy cradle, then covered the roller with a plastic bag to keep it moist.
The PaintStick clean-up…
I have to admit…if this product wasn’t so darn good, I would probably have a hard time with it once it came to the clean up. Because of the moving parts, there’s the necessary evil of thorough cleaning. Now, with practice and a descent sized (garage) sink, this chore wouldn’t be so bad. However, I had to use a small bucket which I lugged into the kitchen and out to my backyard four times to refill with clean, warm water and then to dump the dirty water.
Still, the parts were easy to clean and the disassembling was no biggie. Before packing everything up, I used petroleum jelly to lubricate the inner handle o-ring, the outer end cap, the inner end cap and seal, and the fill port. This is an important step if you plan to store it for a while. I’ve read reviews where leakage can occur if these aren’t properly attended to. All in all, a worthwhile task for such a tidy and user-friendly tool.
Check out the video which really helped me a bunch:
The PaintStick is available at box stores such as Lowe’s and Ace Hardware; online at HomeRight.com, HomeDepot.com, Amazon. Price: between $16.00-$29.99, depending on where you buy.
There is only one roller included in the PaintStick kit, so if you’d like to buy replacement rollers (with the necessary perforation feature), they are available at Lowes (in store or online), Homedepot.com, and Amazon.com. Prices range from $5.97 to $7.99 depending on where you buy.
Have you used the PaintStick? What did you think about it?
All photography by Skaie Knox, HomeJelly


