Moving from our garage to an office is a feat unto itself in the world of start-ups. Yes, we are climbing the ladder to success, so, when I was asked to help decorate our new Wonderful Collective office, I knew it had to be inspiring. The hidden challenge? Well…let’s just say there were too many cooks in the kitchen.
Common as this may be, a differing of opinions and tastes can hinder the progress of a decorating project. But, when we were invited (and, thusly sponsored) to install a set of beautiful FLOR carpet tiles, I knew they would absolutely move us in the right direction design-wise and make our Wonderful offices…well…wonderful!
Here’s what HomeJelly LOVES about FLOR carpet tiles:
1. The VAST selection of colors and patterns. So often, carpet tile companies or design stores are limited to a particular seasonal line, color palette or pattern. FLOR offers hundreds of choices that can then be customized and even changed around whenever you wish.
2. They’re modular. Meaning, you can create shapes other than squares or rectangles, color designs and unique patterns to fit your space and style.
3. They’re flexible. FLOR has carpet styles, textures and materials that can fit in all kinds of different rooms: living room, office, nursery, home gym, bathroom and even your garage!
4. They’re green! FLOR uses recycled materials in everything they make and are currently transitioning their entire collection to 100% recycled materials. Most of their styles meet or exceed the low VOC (Volatile Organic Compounds), Green Label Plus standards set by the Carpet and Rug Institute. What’s more, when you’re done using your carpet tiles (or they’ve happily lived out their life), you can return them to FLOR at no cost to you, where they will recycle them back into usable materials. Awesome.
Here’s what we DID with our FLOR carpet tiles:
1. Starting with a blank canvas (Right?), we chose our design. This was, by far, the most difficult part of the process! Ultimately, we selected the “Made You Look“ design.
2. Opened the “open me first” box. The inside cover included a friendly greeting as well as a QR code which offered an easy-to-follow, assembly video tutorial.
3. We took stock of our carpet tiles using the pattern key to make sure we had everything we needed.
4. We laid out the design before applying the FLORdots. This way, we could make sure the pattern looked correct. I noticed that I had laid a few tiles upside-down. Note: if you do decide to apply the FLORdots as you first lay out your design, even if you place a tile incorrectly, you can simply unstick the dots, make the correction, then reapply. No worries!
5. We applied the FLORdots. They come with hash marks that make applying them quite easy (it’s a bit hard to see in this photo below…but they’re there!). We applied one dot to one corner first.
Then, as we lifted the other three corners, we dropped the first corner with the dot (sticky side up) to the floor.
Finally, we pressed all the corners down and tightly together to finish that section.
Progress!
TIP! Applying the FLORdots with two people make the process twice, even three-times as fast!
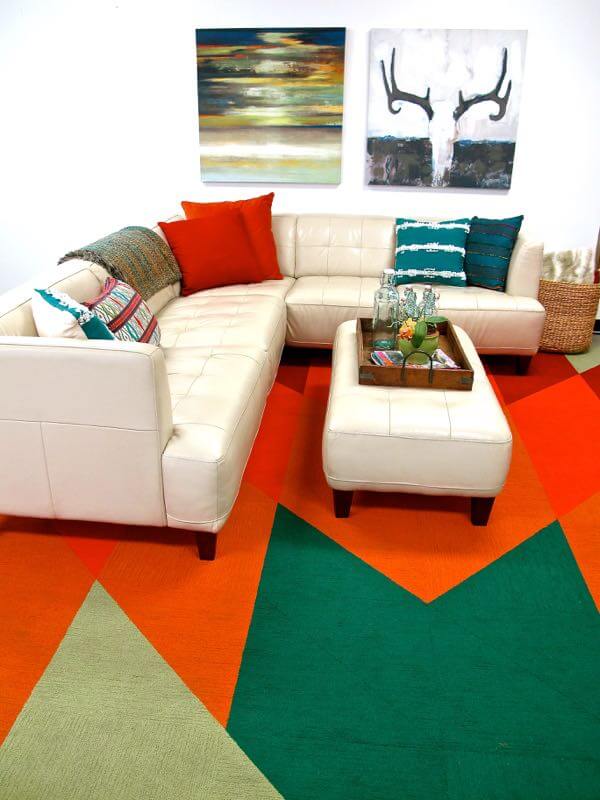
Finished! See now, how our new FLOR inspired us to add even more pops of color!
Tip! When dressing a room, start with your area rug (or FLOR carpet tiles!) – the most dominate element in a space- then add decor layers like pillows, throws, baskets, etc. with colors, textures and patterns inspired by your flooring.
OOPS ANSWER! & Extra Tip! Always stand back and look for ways to improve a design. I realized after posting this blog that I missed a perfect opportunity. There is a “W” in this FLOR square pattern which is a great and subtle branding opportunity for this “Wonderful” office. DUH! Now, I’ve got to move the sofa and flip the tile carpets around! Live and learn!
If you have questions about FLOR carpet tiles, you can check out their FAQs.


