The countdown has already started…T-minus 6 days to go until the big day! Yes, my brother-in-law, Johnnie, and his fiancee, Alexis, will be tying the proverbial knot, and it has been my honor to help them decorate their venue in a fun and interesting way. One of the two biggest requirements was that the decor items had to be unique and eclectic, and I had to accomplish this within budget. I secretly challenged myself to stay under $200 for everything decor-related…and, my friends, I’m happy to announce that I’ve done it!
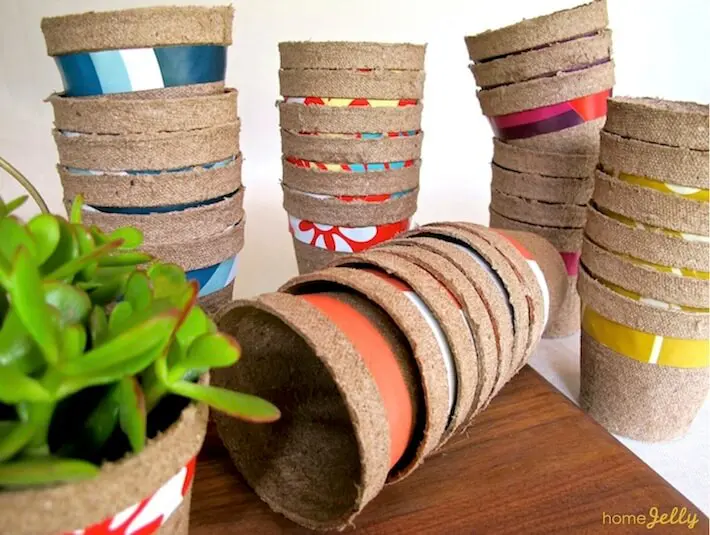
Today’s fun wedding decor how-to, “Removable Wall Paper Jiffy Pots”, is not only a perfect example of how I saved a lot of green to remain in the black, it’s also a fantastic way to add color and naturalness to your wedding tablescapes. Oh, and these cuties are also fabulous wedding favors for your guests! With that, I thought I’d share this very simple and beautiful project with you to use at your next shindig or just around the house.
I was absolutely inspired by Kimberly’s blog, A Night Owl, and her sweet and clever painted Jiffy pot project. I instantly knew I could put my twist on it with the help of HomeJelly friend, Elizabeth Rees of Chasing Paper (you’ll just LOVE her designs and newest collection…check it out!). Now, go warm yourself a cup of tea or pour a glass of wine and enjoy!
Supplies:
• 3″ Jiffy peat round pots – (I found these at groworganic.com. Note: I instantly fell in love with these little pots, mainly because they look like they’re made of burlap and, because they’re made of 100% biodegradable sphagnum peat moss and wood pulp, they can be directly transplanted right into the ground!)
• removable wallpaper – (Visit Chasing paper to view their fabulous designs)
• one piece of card stock paper
• scissors
• ruler
• pencil
• flowers or succulents – Note: interestingly enough, Home Depot has a pretty great selection of succulents with prices competitive to some whole sale nurseries. Also, visit your local farmer’s or monthly antique flea markets…there are often vendors selling them REALLY cheap. We found these for about .80 each!
Instructions:
Step #1: Create your template for the wallpaper band. Take one of your Jiffy pots and draw a pencil mark 1″ below the rim.
Step #2: Cut along the penciled line.
Step #3: To make things easy, create a new, flattened template. After this first one was made, I noticed it had a hard curve to it due to it being the top part of the original pot. This made tracing around it difficult. So now, to get around that, carefully lay the Jiffy strip onto a card stock piece of paper, trace and cut around it, and use the new one as your working template.
Step #4: Using your new, flat template, trace around it onto the back of your removable wallpaper and cut. Make as many wallpaper wraps as needed.
Step #5: Remove the sticky, but removable paper, then wrap each Jiffy pot just under the rim.
You’re done!
Use all kinds of different designs to create a fun collection of colors and patterns! What a fun addition to an eclectic wedding, don’t you think?
Perfect for a succulent wedding centerpiece and take-home favor…just simply remove the removable wallpaper wrap and plant!
Tell us what you think about these little pots!
All photography by Skaie Knox, HomeJelly. All the removable wall paper was graciously donated by Chasing Paper.


