Growing up, one of the things that made the holidays special was the way my aunties decorated our dinner tables. To this day, my Aunt Mim, especially, stands out as the Martha Stewart (long before Martha became Martha) of our family.
After all the hugs and hellos, we’d make our way into the dining room where we’d be greeted by wonderful tablescapes, napkin holders, and place holders she had painstakingly hand-crafted, with details that would make the most doleful of guests immediately cheer up with appreciation.
This year, I am co-hosting Thanksgiving dinner with my mom and sister-in-law and am solely in charge of the decorations. With 19 guests, that is no a small feat, but I’m up for the challenge.
In light of my love of repurpose and upcycling, I wanted to try and use items I had laying around and outside the house and, with the help of designer Taniya Nayak (HGTV), tweaked and came up with my own version of a fun turkey wine cork napkin holder, perfect for Thanksgiving.
I would like to dedicate today’s blog to all my aunties and mother, who, with all their time and effort, created and passed along an attention-to-detail tradition that I know my siblings, cousins and I will carry on for years to come. Cheers!
Supplies:
• wine corks
• colorful fall leaves
• drill with 5/32″ drill bit
• twine, string or thin ribbon
• map push pins (short)
• toothpick
• yarn needle (large)
• pliers
• red and orange felt
• scissors and sharp knife
• black Sharpie pen
• crafting glue and glue stick
• pennies
Instructions:
Step #1: Drill hole for twine.
Step #2: Insert map pins for the eyes. Be sure to center them between the two drill holes…but have fun as to how wide you place them.
Step #3: Cut at an angle to create the mouth for the beak.
Step #4: Cut out the felt beak. It will look like a diamond shape.
Step #5: Apply glue inside of the mouth, then use a toothpick to insert the beak. You can hold the toothpick against the felt beak until it takes hold.
Step #6: Wet and bite flat your twine, then insert into pre-drilled hole. Wetting the twine and biting it flat will make it much easier to thread your yarn needle. Tip: use your pliers to pull the needle through in case it’s hard to pull with your fingers.
Step #7: Use your Sharpie pen to make the irises which will make the eyes appear more realistic. Fun!
Step #8: Cut, glue and apply your red felt to create the turkey wattle. (*hee.)
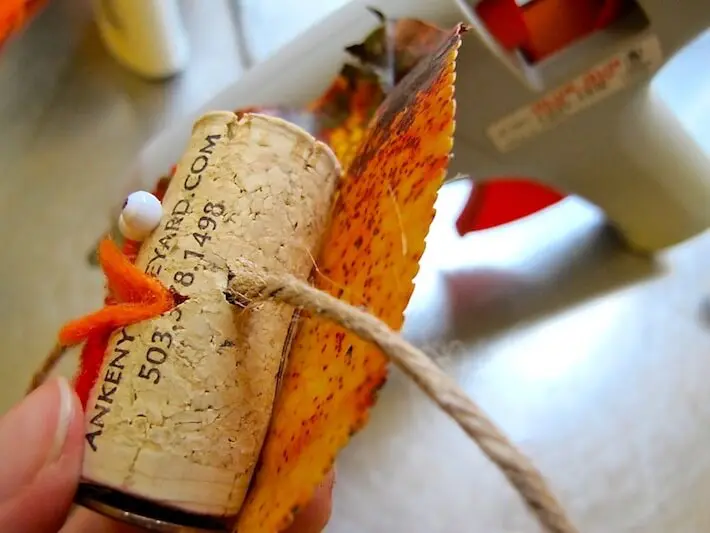
Step #9: Hot glue a penny to the bottom of your wine cork to keep your turkey stable.
Step #10: Hot glue your leaf to the back of the wine cork, then tie to your napkins.
Fini! Gobble! Gobble!
Might you try this fun crafting project for your Thanksgiving dinner? What other ideas do you have?
All photography by Skaie Knox, HomeJelly


