
Lamp with light off, light on!
UPDATE!
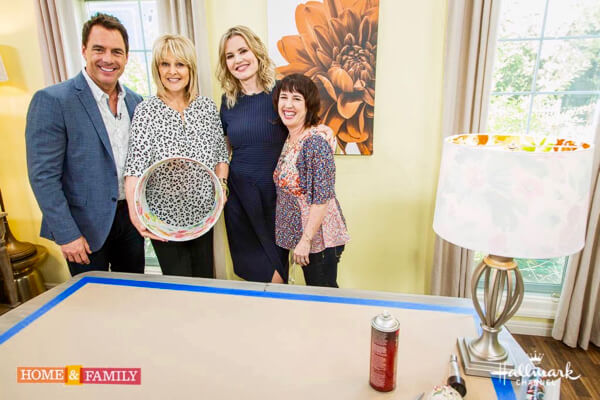
Recently, I was selected as a FINALIST for Hallmark Channel’s Home and Family show‘s DIY Star Contest, and was invited to demonstrate LIVE how to make my “Peek-a-Boo” lamp shades! And as fate would have it, my lovely DIY assistant was Geena Davis!!! Pinch me, please!
The air date is Tuesday, April 26th, from 10:00am – 12noon. If you enjoy my segment, I’d so appreciate it if you click in to Home and Family’s Facebook page and tell them! I could be invited back to do more for y’all.
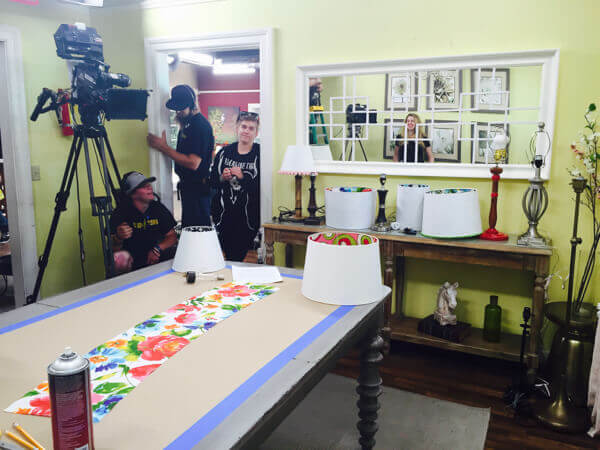
On the set of Hallmark Channel’s “Home and Family Show”, getting ready to shoot my segment with Geena Davis!
Mark Steines and Cristina Ferrare welcome Academy Award-winning actress Geena Davis to talk about the Bentonville Film Festival and joins finalist of our “Home and Family” DIY Star contest, Skaie Knox in making a DIY peek-a-boo lampshade. Credit: Copyright 2016 Crown Media United States, LLC/Photographer: jeremy lee/Alexx Henry Studios, LLC
———————————————————-
Inspiration is all around us. It certainly snuck up on me the other day as I was perusing the aisles of Home Depot. I happened upon the light department and something caught my eye. It was a simple white shade but on the inside, I noticed an orange, graphic pattern printed on the plastic. It was as if the shade had been turned inside out. Immediately, I thought to myself, “I bet that’ll work with fabric!” Yup, it sure did.
How to Make A Lamp Shade With Peek-a-Boo Flair
Supplies:

Lamp shade supplies.
- white lamp shade
– we used three sizes: small (top dia: 8″, bottom dia: 10″, height: 7″), medium (top dia: 11″, bottom dia: 13″, height: 9″), and large (top dia: 13″, bottom dia: 15″, height: 10″)
- 1/2 yard of fabric
- Aleene’s All Purpose Tacky Adhesive Spray
– this stuff is fantastic!
- wrapping paper w/cutting guides – perfect for when you need a large surface to trace on to AND the guide lines make cutting straight a snap! (Thanks Mom for the brilliant tip!)
- pencil and sharpie marker
- scissors
- yard stick – you’ll also want to use your yard stick for keeping the wrapping paper from curling while measuring the dimensions of your lamp.
Instructions:

Trace the lamp shade’s exterior.
1. Create your TEMPLATE.
(a.) Place the lamp shade on its side onto your wrapping paper.
(b.) TAPE THE EDGE OF THE PAPER TO THE SHADE to keep in place.
(c.) Carefully mark the start point with a dot, then begin tracing a line along the bottom edge of your shade, starting at the seam.
(d.) Roll the shade along its edge all the way around, stopping at the seam (mark that end point with a dot). Do the same on the top edge.
(e.) Once finished, connect the two starting point dots and the ending point dots using your ruler. Cut INSIDE your guide line 1/8″ so your fabric piece will fit INSIDE the shade’s edge…there’s your pattern!

Check for correct sizing.
2. Check for correct sizing: before pinning your pattern to your fabric, be sure to check that you traced your pattern correctly. Wrap your pattern around the outside of your shade and see if it fits nicely or if the pattern is too large or crookedly cut. Here’s where you can save yourself some time and money. If need be, make the adjustments, or even start over if it’s totally off. Note: This is the hardest part of the how-to. Better to take the extra time to fix your pattern instead of wasting your beautiful fabric…go on, now…it’s just a little extra time to get it right!

Pin pattern to wrong side of fabric.
3. Pin pattern to wrong side of fabric. Mindfully place your pattern onto the wrong side of the fabric (so when you use your marker, it won’t show on the nice side!). Also, with a half a yard, you will have enough fabric to cut two small shades or one small and one medium shade.

Cut out fabric.
4. Cut out fabric. If you pinned nicely (about 1 – 2 inches apart), you’ll see that cutting the fabric will be a breeze! Otherwise, pin just the ends and middle, then trace the edge with a pencil. Optional: if you’d like to make cutting dots along your pattern with a Sharpie, be sure to use light marks.

Spray tacky spray to inside of shade.
5. Spray tacky spray to the inside of shade. Be sure to go outside or have plenty of ventilation. Generously spray the inside of the shade, making sure you completely covered the entire surface. Note: be careful handling the outside of the shade, as it is easy to get sticky hands using this medium. Having a soapy paper towel and clean towel handy is helpful.

Press fabric right side out to inside of shade.
6. Press fabric right side out to the inside of shade. Slip the fabric inside the shade, then, starting at the seam, begin pressing down the fabric. Be sure to get rid of any bubbles. Note: you’ll easily be able to pull up the fabric if you make a mistake, so no worries if you don’t get it right the first time. Also, to get rid of all the bubbles, I found I had to pull up some of the edges, re-spray more tacky glue, then press again. Easy-peasy! Done!
Here’s one I just made called “Under the Sea”:

Under the Sea shade, light off.

Under the sea shade with light on! Oooh…look at all the fishies!
Not in a DIY mood? Visit our HomeJelly shop and purchase a “Peek-a-boo” lamp shade handmade by Skaie!
There are currently a ONE available, but more are soon to come!
All photographs by Skaie Knox, HomeJelly